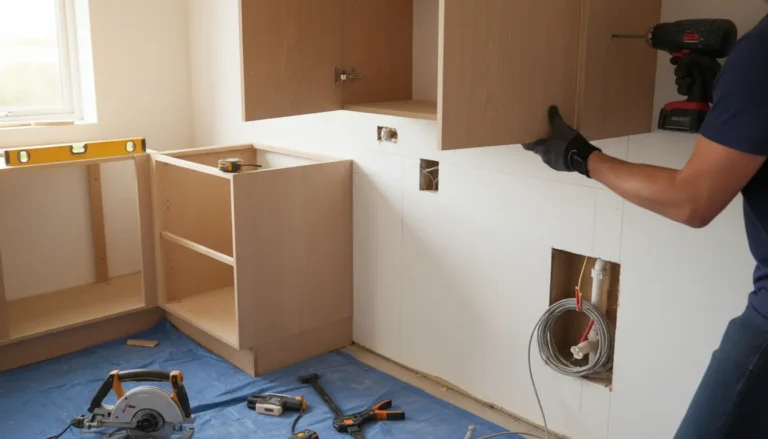
Kitchen cabinet trim installation is the finishing step that turns standard cabinets into a polished, built-in kitchen feature. This page shows you what matters before, during, and after installation, from measuring and profile selection to seamless corners and clean fastening. With practical guidance, professional checkpoints, and clear next steps, you can avoid uneven lines, visible nail holes, and awkward crown molding transitions while creating a result that feels intentional, durable, and tailored to your home.
Why the right trim changes the whole kitchen
Cabinet trim is often the difference between a kitchen that looks assembled and a kitchen that looks designed. Even high-quality cabinets can feel unfinished when gaps remain above wall units, side panels stop abruptly, or crown molding does not align with doors and fillers. Well-planned trim creates visual continuity, hides small construction tolerances, and frames the cabinetry so it feels connected to the walls, ceiling, and overall room design.
For homeowners planning a remodel, trim also offers excellent value. It can upgrade the appearance of existing boxes, refine new installations, and help combine different cabinet depths in a way that looks intentional. If you are comparing cabinet styles, finishes, or layouts, the trim plan should be considered early, not treated as an afterthought. A shaker kitchen, a modern flat-panel kitchen, and a traditional raised-panel kitchen all need different trim decisions to look their best.
What a professional-looking installation includes
A clean result depends on more than cutting crown molding at an angle. The best installations start with a layout check, cabinet alignment review, and a clear decision on how the trim will terminate at walls, corners, tall pantry units, and ceiling changes. The goal is simple: every visible line should look deliberate.
Key details that matter
-
Consistent reveal: The flat trim or subrail should sit evenly in relation to cabinet doors, end panels, and fillers.
-
Strong backing: Crown molding needs a secure nailing surface, often through a riser board, nailer strip, or furring strip.
-
Accurate corners: Outside corners, inside corners, and return pieces must be planned before trim is cut.
-
Clean seams: Joints should be tight, supported, filled carefully, and finished in a way that matches the cabinet color.
-
Balanced proportions: Trim height should suit the cabinet height, ceiling height, and door style.
If your cabinets are not installed yet, review the full cabinet setup first. A good starting point is professional guidance on kitchen cabinet installation, because trim can only look straight when the cabinet run is level, plumb, and securely fixed.
Common trim types and where they work best
Different trim pieces solve different visual and practical problems. Choosing the right combination helps avoid bulky, awkward, or undersized results.
Crown molding
Crown molding is used at the top of wall cabinets to bridge the space between cabinetry and ceiling or to create a decorative cap. It works beautifully when the ceiling is reasonably level and there is enough vertical rise for the profile. In traditional kitchens, a larger crown can add elegance. In transitional kitchens, a simpler crown profile creates a refined but not overly ornate finish.
Riser boards and flat fascia
A riser board is a flat section installed above the cabinets, often below crown molding. It is especially useful when cabinets do not reach the ceiling or when you want the crown to sit higher. It can also help conceal uneven ceiling lines by giving the installer a controlled surface to work from.
Light rail molding
Light rail trim is installed under wall cabinets. It hides under-cabinet lighting, softens the bottom edge, and creates a finished appearance. It is practical in kitchens with task lighting, glass fronts, or open sightlines from nearby dining areas.
Scribe molding and filler trim
Scribe molding covers small gaps between cabinets and walls. It is especially useful in older homes where walls are rarely perfectly straight. Filler trim can also bring sections forward so doors, panels, and crown molding align properly.
Practical installation process
Although every kitchen is different, a reliable installation follows a clear sequence. Skipping preparation often leads to visible seams, poor corner placement, and trim that appears to float instead of belonging to the cabinet design.
-
Check cabinet alignment. Confirm that wall cabinets are level across the full run and that doors and end panels are adjusted.
-
Map every termination point. Decide where trim stops at walls, tall units, appliance panels, windows, and open shelves.
-
Measure the ceiling gap. Identify high and low spots so the trim height can be planned realistically.
-
Install backing strips. Use secure nailers or riser boards so the visible molding is fastened to stable material.
-
Dry-fit before fastening. Test the pieces, especially corners and returns, before glue or nails are used.
-
Fasten carefully. Use appropriate brad nails, adhesive where suitable, and avoid over-fastening delicate profiles.
-
Fill, caulk, and finish. Nail holes, seams, and small gaps should be treated with materials compatible with the cabinet finish.
For example, imagine a kitchen with frameless cabinets and full-overlay doors. If the flat trim sits too far back, the doors may appear to project awkwardly beyond the crown. If it sits too far forward, the trim can look heavy and disconnected. A small reveal decision can change the entire look, which is why pre-planning is so important.
DIY versus professional installation
Some homeowners can handle simple scribe molding or a short light rail run. Crown molding, multi-piece trim, and installations with uneven ceilings are more demanding. The difficulty is not only cutting angles; it is understanding how the profile sits in space, how corners return, and how to correct imperfect walls without making the correction visible.
DIY may be suitable when
-
The cabinet run is short and straight.
-
The trim profile is simple and prefinished touch-up materials are available.
-
You have a quality saw, measuring tools, clamps, and finishing supplies.
-
You are comfortable making test cuts and accepting a slower process.
A professional is usually better when
-
The kitchen includes outside corners, tall cabinets, stepped cabinet heights, or ceiling variation.
-
The cabinets are frameless or high-gloss, where mistakes are highly visible.
-
The trim is stained wood, custom painted, or part of a larger renovation.
-
You want the finish to look integrated rather than simply attached.
If trim is part of a wider remodel, it helps to coordinate cabinetry, panels, and finish details through a broader kitchen cabinet design plan. That way, crown height, fillers, side panels, and lighting are chosen together.
How to avoid the most expensive mistakes
The most common trim problems are preventable. One frequent issue is placing the corner joint in the wrong visual location. Another is using nails that leave large holes in a finished cabinet face. Homeowners also notice when a seam is not preassembled tightly or when the trim dies into a wall without a clean return.
Before work begins, ask these questions:
-
Where will each corner joint be located?
-
Will the trim align with the door faces, fillers, or cabinet boxes?
-
How will nail holes be filled and color-matched?
-
Will the crown be attached to a riser, a nailer, or the cabinet itself?
-
How will uneven ceilings or walls be handled?
These questions protect your budget because correcting poor trim work can require removing finished pieces, repainting, or ordering new molding. Careful planning costs less than repair.
What homeowners notice after a quality finish
The strongest feedback after a successful trim installation is often simple: the kitchen finally looks complete. Visitors may not point to the crown molding specifically, but they notice that the cabinets feel built in, the ceiling transition looks clean, and the room has a more finished character. In open-concept homes, this matters even more because the kitchen is visible from living and dining spaces.
Another common benefit is confidence. When trim is properly aligned and finished, homeowners are less likely to worry about small gaps, shadow lines, or visible fasteners. The result feels permanent and intentional, which supports both daily enjoyment and long-term home value.
Choosing the right service path
If you are still planning cabinet purchases, trim should be included in the scope before ordering. If the cabinets are already installed, a site review can identify whether you need crown, riser boards, scribe, light rail, or filler adjustments. The best path depends on your cabinet style, ceiling height, finish material, and tolerance for visible seams.
A simple refresh may need only scribe molding and touch-up work. A full custom look may require multi-piece crown with a riser board, finished end panels, and under-cabinet light rail. If budget is a major factor, compare trim work alongside broader installation expenses using a resource such as kitchen installation cost guidance.
Ready for a cleaner, custom-looking cabinet finish?
Kitchen cabinet trim installation is one of the highest-impact finishing upgrades you can make. Whether your goal is to hide gaps, complete a renovation, or make stock cabinets look custom, the right plan will save time and prevent costly rework. Start by documenting your cabinet layout, taking clear photos of corners and ceiling gaps, and choosing the trim style that matches your kitchen’s character. Then move forward with a measured, professional approach that gives your cabinetry the finish it deserves.
Kitchen cabinet trim installation adds polish, hides gaps, improves proportions, and helps cabinets look truly built in. The best results come from careful planning, secure backing, clean corners, and finishing details that match your cabinet style. If you want a kitchen that looks complete rather than patched together, do not leave trim to chance. Review your layout, choose the right profile, and take the next step toward a cleaner, more custom cabinet finish today.
Frequently Asked Questions
Is Kitchen cabinet trim installation worth it for standard cabinets?
Yes. Kitchen cabinet trim installation can make standard cabinets look more custom by covering gaps, improving top transitions, and adding architectural detail. It is especially valuable when cabinets stop short of the ceiling or when side panels look unfinished. The upgrade is often more affordable than replacing cabinets.
Can I install crown molding on kitchen cabinets myself?
You can install crown molding yourself if the cabinet run is simple, the ceiling is level, and you have accurate cutting tools. However, Kitchen cabinet trim installation becomes harder with outside corners, frameless cabinets, riser boards, and stained finishes. If mistakes would be costly, hiring a professional is usually safer.
How do I hide gaps between cabinets and the ceiling?
Gaps can be hidden with crown molding, a riser board, flat fascia, or a combination of trim pieces. The best option depends on the gap height and ceiling condition. For Kitchen cabinet trim installation, a riser board often creates a cleaner base for crown molding and helps manage uneven ceilings.
What causes cabinet trim to look uneven or poorly fitted?
Uneven trim is usually caused by cabinets that are not level, walls that are not straight, inaccurate measurements, or poor corner planning. Visible nail holes and mismatched filler can also weaken the final look. Proper Kitchen cabinet trim installation starts with layout checks before any molding is cut.
Should trim be installed before or after cabinet doors are adjusted?
Cabinet doors should generally be adjusted before final trim decisions are made. Door alignment affects reveals, projection, and how crown or flat trim appears from the front. During Kitchen cabinet trim installation, checking doors first helps prevent trim from sitting too far forward, too far back, or unevenly across the run.
About the Author