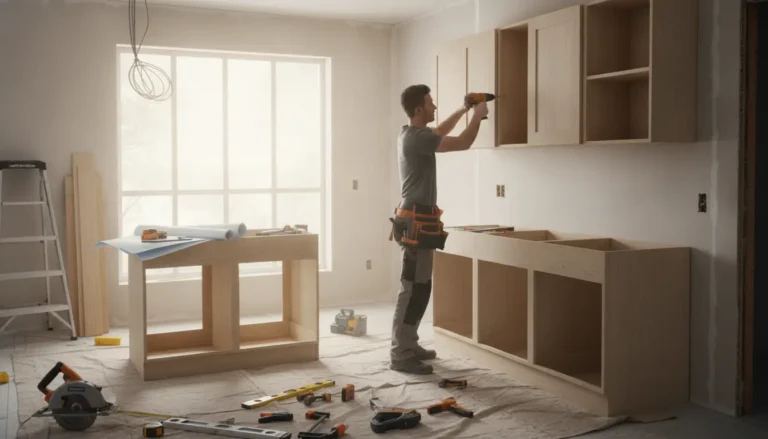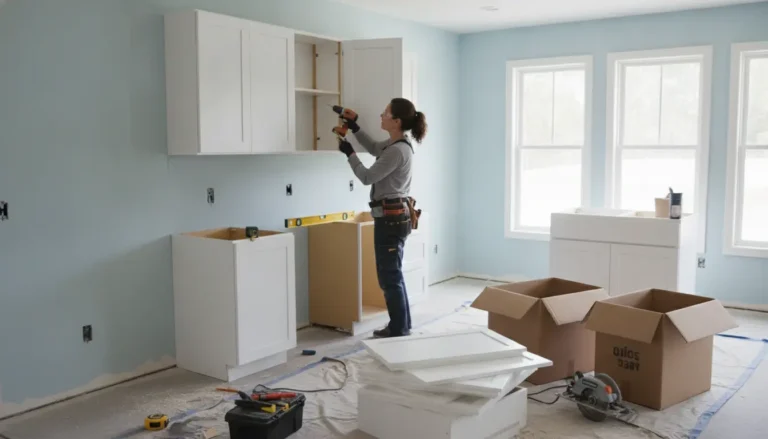
Kitchen cabinet installation guide visitors need a clear, reliable way to plan, level, secure, and finish cabinets without costly mistakes. This page gives you a practical route from measurement to final adjustment, whether you are comparing DIY installation with a professional service or preparing for installers. Based on proven cabinet fitting principles, it helps you understand the process, avoid delays, protect your investment, and choose the right next step with confidence.
Start with a cabinet plan that prevents expensive rework
A successful cabinet installation begins long before the first screw goes into the wall. The most common problems are not caused by the cabinets themselves, but by unclear measurements, uneven floors, hidden services, and rushed layout decisions. A solid plan helps every base unit, wall cabinet, pantry cabinet, corner unit, door, drawer, and finishing panel sit exactly where it should.
Begin by checking the full room, not just the area where the cabinets will stand. Look at floor level changes, wall bows, ceiling height, window positions, appliance clearances, plumbing routes, electrical outlets, extractor placement, and door swing. If you are replacing existing units, do not assume the old layout was correct. Many older kitchens hide alignment problems behind filler strips, thick worktops, or oversized trim.
Before buying or booking installation, compare your layout with cabinet sizes, door openings, and storage needs. If you are still deciding which units fit your space, review practical options on kitchen cabinets so your installation plan matches the product choice from the start.
Why correct installation matters more than most people expect
Well-installed cabinets do more than look straight. They support heavy cookware, align with worktops, protect doors from rubbing, and help appliances sit safely. A cabinet that is slightly out of level can cause drawers to slide open, doors to reveal uneven gaps, and countertops to sit under stress. Over time, that can lead to loosened fixings, cracked sealant, damaged hinges, and visible distortion.
Correct installation gives you several practical advantages:
-
Better daily use: drawers run smoothly, doors close cleanly, and internal organizers work as intended.
-
Longer cabinet life: secure fixing and proper leveling reduce strain on frames, hinges, and runners.
-
Cleaner finishes: end panels, plinths, cornice, pelmet, and handles align neatly.
-
Safer storage: wall cabinets are fixed into suitable structure, not just surface material.
-
Higher home appeal: a fitted kitchen that looks intentional can improve the feel and perceived value of the room.
Tools, materials, and checks before installation day
For a typical cabinet installation, you need a level, measuring tape, pencil, stud finder, drill, driver, clamps, shims, cabinet screws, wall fixings suited to the wall type, safety glasses, and a support ledger for upper cabinets when appropriate. For a professional finish, also prepare a scribing tool, hole saws for pipe and wire access, a straightedge, and suitable trim cutting tools.
The most important checks are simple but non-negotiable. Find the high point of the floor before positioning base cabinets. Mark a level reference line around the room. Locate studs or secure fixing points before lifting wall cabinets. Confirm appliance dimensions and service openings before cabinets are locked together. If plumbing, gas, or electrical work must pass through cabinets, bring in the correct licensed trade rather than cutting first and hoping later.
The preferred installation order for clean results
Set accurate layout lines
Marking the room properly is the foundation of the full job. A laser level is useful, but a traditional level can also work if used carefully. Mark the line for the tops of the base cabinets and the lower edge of the wall cabinets. This creates a visual guide for every unit. In a room with an uneven floor, do not follow the floor. Follow the level line and use shims or adjustable legs to compensate.
Install base cabinets from a strong starting point
Many installers start from a corner or a fixed tall unit because it anchors the layout. Place the first base cabinet, check it front to back and side to side, then secure it only when it is correctly positioned. Continue with the next cabinet, clamp adjoining frames together, align the fronts, drill pilot holes where needed, and connect the frames. Work slowly. A small error at the first unit can multiply across the entire run.
Scenario: in a galley kitchen, the wall may not be perfectly straight. Instead of forcing each cabinet tight to the wall, align the cabinet fronts and use shims at the back. This keeps the visible line clean and gives the worktop a more reliable base.
Fit corner and specialty cabinets with extra care
Corner units, pull-outs, sink bases, and pantry cabinets need more attention because they interact with doors, plumbing, or internal mechanisms. A lazy Susan or pull-out corner cabinet must sit square so its shelves and doors move freely. A sink base needs clean cutouts for pipes without weakening the cabinet unnecessarily. Tall cabinets should be checked vertically because even a small lean becomes obvious beside a refrigerator or oven tower.
If corner access is a priority, compare cabinet options before installation using corner kitchen cabinet ideas. Choosing the right corner solution early can reduce awkward filler pieces and improve storage after the kitchen is complete.
Hang wall cabinets securely and safely
Upper cabinets are often the most intimidating part of the project because they are heavy, awkward to hold, and highly visible. Use a support ledger or temporary rail when suitable, and never try to lift large wall cabinets alone. Position the cabinet on the layout line, confirm it is level, then fasten it into studs or approved wall fixings. After the first wall cabinet is secure, connect the next cabinet to it and check alignment before final tightening.
Scenario: over a stove, the cabinet may need clearance for an extractor, ducting, wiring, or lighting. Plan and drill access holes before mounting the unit. This prevents rough cuts in a cramped position and keeps the cabinet interior neater.
Attach doors, drawers, panels, and trim after the boxes are true
Doors and drawers are best installed after the cabinet boxes are secured. This makes units lighter to move and prevents hardware damage during fitting. Once the boxes are aligned, attach hinges, install drawer fronts, adjust reveals, and add handles. Finish with plinths, end panels, fillers, crown moulding, cornice, pelmet, or light rails depending on your design.
Door adjustment is not a sign of poor cabinetry. It is a normal final step. Use hinge adjustment to even the gaps. Check drawers with weight inside, not only when empty, because loaded drawers can reveal small alignment issues.
DIY installation or professional fitting?
DIY cabinet installation can work well for confident homeowners with carpentry experience, patience, and the right tools. It can also save labor costs when the layout is simple, the walls are sound, and services are already in the correct place. However, cabinets become less forgiving when the room is out of square, the kitchen includes tall units and panels, or the design involves integrated appliances, stone worktops, lighting, and hidden services.
A professional installer brings speed, accuracy, problem-solving, and responsibility for the finish. The value is especially clear when errors would delay countertop templating or appliance connection. If you are comparing total project costs, include the price of tools, potential remedial work, and your own time. For many homeowners, the most cost-effective choice is professional fitting for the cabinet boxes and DIY involvement in simpler finishing tasks.
For a closer look at service options, timelines, and what professional fitting includes, visit kitchen cabinet installation.
What experienced installers do differently
Experienced fitters do not simply screw cabinets to the wall. They read the room. They decide where to hide tolerance, where to scribe, where to use fillers, and how to keep the visible lines balanced. They also know when a wall fixing is not sufficient and when a service route needs professional attention.
They usually work with a sequence like this:
-
Confirm the plan, cabinet list, and appliance requirements before unpacking everything.
-
Check the room for level, square, and service conflicts.
-
Set reference lines and decide the best starting cabinet.
-
Install base units, keeping fronts aligned and boxes secure.
-
Install tall and wall cabinets with safe support and reliable fixings.
-
Complete panels, fillers, trim, doors, drawers, handles, and final adjustments.
This methodical approach is why professional results often look calmer and cleaner. The homeowner may not see every shim, pilot hole, or scribed panel, but the final kitchen feels balanced because each decision supports the next.
Common mistakes that reduce the final finish
One frequent mistake is fixing cabinets before checking the entire run. Another is following an uneven floor instead of a level reference line. Some DIY installers also overtighten screws, twist cabinet frames, or skip pilot holes when joining units. Wall cabinets can be especially risky if they are mounted into unsuitable material or lifted without support.
Other avoidable issues include cutting service holes too large, attaching doors too early, leaving shims unsupported, ignoring appliance ventilation, and using filler strips as a last-minute rescue rather than a planned part of the layout. The best installation feels smooth because the awkward decisions were handled before the visible finishes went on.
Real-world reassurance before you commit
Installation tutorials, manufacturer guidance, and homeowner remodel stories consistently show the same pattern: careful preparation matters more than rushing through visible steps. People who take time to mark layout lines, locate fixing points, and level the first cabinet usually avoid the biggest frustrations. Those who bring in an installer for complex parts often protect the finish and shorten the disruption.
If you are unsure whether your kitchen is suitable for DIY, use this simple test. If you can confidently measure, level, find structural fixing points, clamp frames, drill accurately, scribe panels, and solve out-of-square walls, DIY may be realistic. If several of those tasks feel uncertain, a professional installation can be the smarter investment.
Ready for a cabinet fit that looks built-in?
Your kitchen cabinets are one of the most visible and heavily used parts of the home. A careful installation gives you better storage, a cleaner design, and fewer repairs later. Use this guide to plan your project, compare DIY and professional options, and make informed decisions before the first cabinet is fixed. If you want a finish that looks straight, secure, and made for your space, request installation guidance or connect with a qualified kitchen fitting specialist today.
A strong cabinet installation starts with accurate planning, level reference lines, secure fixing, and patient final adjustment. Done well, it improves safety, storage, appearance, and long-term durability. Whether you choose DIY for a simple layout or professional fitting for a polished result, the right process protects your investment. Use this Kitchen cabinet installation guide to plan confidently, then take the next step toward a kitchen that fits beautifully and works every day.
Frequently Asked Questions
Can I use this Kitchen cabinet installation guide if I am a beginner?
Yes, this Kitchen cabinet installation guide is suitable for beginners who want to understand the process before starting or hiring help. However, lifting upper cabinets, fixing into walls, and cutting around services require care. If you lack tools, support, or confidence with structural fixing, use the guide to prepare and then hire a professional installer.
Should base cabinets or wall cabinets be installed first?
Many installers fit base cabinets first because they establish the layout for worktops, appliances, and tall units. Others hang wall cabinets first to avoid working above finished base units. This Kitchen cabinet installation guide recommends choosing the order based on your room, cabinet weight, support method, and installer preference, while always keeping level reference lines consistent.
How do I know if my wall cabinets are safely secured?
Wall cabinets should be fastened into studs, solid structure, or approved fixings for the wall type. Screws should not rely only on plasterboard unless specialist load-rated anchors are specified. This Kitchen cabinet installation guide also recommends using a support ledger during fitting and checking the cabinet remains level before connecting adjoining frames.
What is the biggest mistake during cabinet installation?
The biggest mistake is installing the first cabinet without fully checking level, square, wall condition, and the complete cabinet run. A small error at the start can create uneven gaps, stressed worktops, and poor door alignment. This Kitchen cabinet installation guide encourages slow setup, accurate marking, and repeated checks before final fastening.
When should I hire a professional instead of doing it myself?
Hire a professional if your kitchen has uneven walls, heavy upper cabinets, tall appliance housings, integrated appliances, plumbing changes, electrical work, or expensive worktops. This Kitchen cabinet installation guide can help you understand the job, ask better questions, and compare quotes, but complex installations often benefit from specialist tools and experience.
About the Author