How to install kitchen base cabinets becomes much easier when you follow a proven sequence: measure the room, find the high point of the floor, set the first cabinet perfectly level, then secure every box with the right fasteners. This guide gives you a practical, contractor-style process that helps prevent gaps, crooked countertops, appliance issues, and costly rework. Whether you are planning a DIY kitchen upgrade or comparing professional installation options, you will learn how to get a cleaner, stronger, countertop-ready result.
Start With a Strong Plan Before Any Cabinet Goes In
Base cabinets carry the weight of countertops, sinks, drawers, appliances, cookware, and daily use. That means a small mistake at the beginning can create visible problems at the end. A cabinet that is slightly out of level can make a countertop seam look wrong, cause drawers to drift open, or leave an uneven reveal beside the dishwasher. The best installation starts before the first screw is driven.
Empty the room, remove old cabinets if needed, and check the wall and floor conditions. Look for bowed walls, low spots in the floor, plumbing stub-outs, electrical boxes, vents, and appliance openings. If you are still deciding on layout, cabinet type, or installation scope, it can help to review professional cabinet options at KitchenAdvisor kitchen cabinets before finalizing your order.
Tools and materials that make the job easier
-
Long level or laser level for accurate layout lines.
-
Stud finder and pencil for marking secure fastening points.
-
Cabinet screws or structural washer-head screws, not drywall screws.
-
Shims for leveling and plumbing each cabinet.
-
Clamps for aligning face frames before fastening cabinets together.
-
Drill, driver bits, countersink bit, and measuring tape.
-
Utility knife, scribe tool, and saw for filler strips or end panels.
The goal is not just to make the cabinets stand in place. The goal is to create one straight, rigid, level run that looks built-in and stays stable after the countertop is installed.
Find the High Point of the Floor First
The most important reference point for base cabinets is the high point of the finished floor. Floors are rarely perfectly level, especially in older homes or remodels. If you start at a low point, you may discover later that a cabinet farther down the run cannot be lowered enough. Starting from the high point allows you to shim other cabinets upward instead of cutting cabinet boxes down.
Use a laser level or a long level to check the floor along every cabinet wall. Mark the highest area. From that point, mark your base cabinet height line on the wall according to the cabinet manufacturer and countertop plan. Standard cabinet dimensions vary by product, so always confirm the box height, countertop thickness, toe-kick detail, and appliance clearances. For deeper planning, you can compare standard measurements through kitchen cabinet dimensions.
Practical scenario
Imagine your refrigerator opening is planned with very little extra clearance. If the base cabinets are set too high because the floor height was not checked, the countertop can interfere with nearby appliance panels or create a mismatch at the end of the run. Measuring from the high point protects the full layout, not just the first cabinet.
Dry Fit the Cabinet Run Before Fastening
Place the base cabinets in their intended positions without permanently fastening them. Confirm that corner cabinets, sink bases, dishwasher openings, range openings, and fillers all match the plan. Check that doors and drawers can open freely. If the layout includes a blind corner, lazy Susan, pantry cabinet, or end panel, verify those pieces before tightening anything.
Dry fitting also helps you catch wall issues. A wall that bows inward can push the front of a cabinet out of alignment. A corner that is not square can affect the face frame reveals. This is where shims, fillers, and scribe panels become important. It is better to solve these details now than after the countertop template is scheduled.
Set the First Cabinet Perfectly
The first cabinet controls the rest of the run. In many kitchens, installers begin with a corner cabinet or the most fixed reference point, such as a sink base centered under a window. Position it on your layout line and use shims under the toe-kick area until it is level from side to side and front to back. Then check that the face is plumb.
Do not rush this step. A cabinet can look acceptable from across the room while still being slightly twisted. Check the top front edge, the back rail, and both sides. If the first cabinet is right, every cabinet after it is easier. If the first cabinet is wrong, every cabinet after it becomes a correction.
How to secure it properly
Locate wall studs and predrill through the cabinet back rail or nailer. Use cabinet-grade screws long enough to reach solid framing. Drive the screws snug, but do not over-tighten and pull the cabinet out of square. Add shims behind the cabinet wherever the wall is uneven, then fasten through the shims so the cabinet stays aligned instead of bending toward the wall.
Join Cabinets Together Before Final Wall Tightening
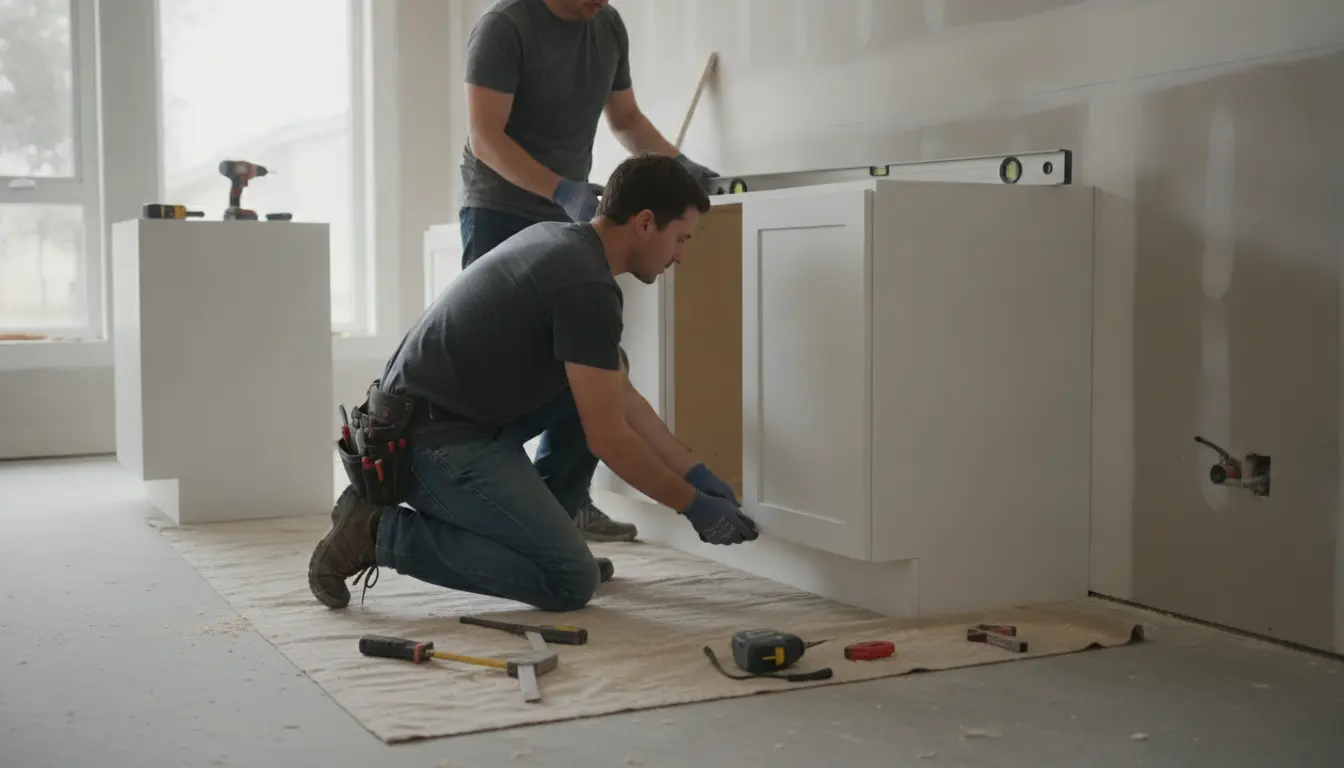
Once the first cabinet is level and lightly secured, bring the next cabinet into place. Clamp the face frames together, align the top edges and front reveals, then predrill and screw the frames together. This creates a cleaner front line and reduces visible gaps. For frameless cabinets, align the cabinet sides carefully and use the recommended connector screws.
Many DIY mistakes happen when cabinets are fastened to the wall first and joined together afterward. If the wall is wavy, the cabinet fronts may follow that wave. A better method is to align the front faces first, then shim behind the backs so the wall connection supports the straight cabinet run.
Example: long wall run
In a long kitchen wall with several base units, stretch a straight line or use a laser along the front edge. As each cabinet is added, check that the face remains straight. Tiny errors can multiply across the run and become obvious at the end panel or range opening. Work slowly, cabinet by cabinet, until the entire bank acts like one stable unit.
Handle Sink Bases, Appliances, and Openings Carefully
Sink cabinets often require plumbing cutouts. Measure carefully before cutting. Oversized holes are common in rushed installations, but they weaken the cabinet and look unprofessional. Cut only what is needed for water lines, drain lines, and valves. If plumbing stub-outs are too long, crooked, or badly placed, correct them before forcing the cabinet into position.
Dishwasher and range openings deserve the same attention. Measure the appliance width, side clearance, countertop support needs, and finished floor height. A dishwasher should slide in and out without scraping the countertop or binding against uneven cabinets. If the cabinet run is not level, appliance installation becomes harder and service access may suffer later.
Shimming Makes the Difference Between Average and Professional
Shims are not a patch for poor work. They are a normal part of quality cabinet installation. Place shims under cabinet bases where the floor dips and behind cabinet backs where the wall bows. Always support weight-bearing areas, especially under side panels and near countertop seams.
After the run is level and secured, score and snap off exposed shim ends. Avoid leaving unsupported gaps beneath cabinet sides. If the toe-kick will be covered, the area can still be neat and solid. A stable base cabinet installation helps stone, quartz, laminate, or solid-surface countertops sit correctly and reduces the risk of cracks or uneven seams.
DIY Installation or Professional Help?
A careful homeowner can install base cabinets successfully, especially in a simple straight run with square walls and stock cabinets. However, professional installation becomes valuable when the kitchen includes stone countertops, out-of-square rooms, custom panels, integrated appliances, islands, or complicated corner solutions.
DIY can reduce labor cost, but mistakes can erase those savings quickly. A mismeasured opening, damaged cabinet side, or uneven countertop template can lead to delays and replacement parts. If you want a clean result without uncertainty, compare installation support through kitchen base cabinet installation.
When a professional installer is worth it
-
You are installing expensive countertop materials that require a perfectly level base.
-
Your floor drops noticeably from one side of the kitchen to the other.
-
Your walls are bowed, out of plumb, or not square.
-
Your layout includes panels, fillers, tall cabinets, or an island.
-
You need the kitchen finished quickly for countertop templating.
Why a Precise Base Cabinet Install Pays Off
Well-installed base cabinets improve the whole kitchen. Drawers operate smoothly, doors align better, countertops sit flatter, and appliance openings stay usable. The kitchen also feels more premium because the lines are straight and the gaps are intentional. Even affordable cabinets look better when they are installed with patience and accuracy.
Homeowners often notice the difference during daily use. A level sink base prevents water from pooling awkwardly around the counter. A square drawer stack keeps reveals even. A properly supported corner cabinet prevents future movement. These details are not flashy, but they are what make a kitchen feel reliable year after year.
Ready to Move From Planning to Installation?
If you already have cabinets on site, start by checking the floor high point, confirming the layout, and marking studs before fastening anything. If you are still comparing cabinet options, installation costs, or professional services, make those decisions before ordering the final pieces. The best time to prevent installation problems is before the cabinets arrive.
Use this guide as your checklist, take your time with the first cabinet, and do not compromise on fasteners, shims, or alignment. For a faster, cleaner, and more predictable outcome, consider getting expert guidance before the countertop template is booked.
Installing base cabinets well comes down to accurate layout, a level starting point, strong screws, careful shimming, and patient alignment. When each cabinet is set correctly, your countertop, appliances, drawers, and finished panels all work better. If you want a kitchen that looks professional and lasts, follow the process closely or bring in an experienced installer. Ready to avoid costly mistakes? Start planning your cabinet installation with expert support today.
Frequently Asked Questions
How to install kitchen base cabinets if the floor is not level?
Start by finding the highest point of the finished floor and mark your cabinet height from there. Set the first cabinet at that reference, then shim the remaining cabinets upward as needed. Never start from a low spot, because you may run out of adjustment room and create countertop or appliance clearance problems later.
Should I screw base cabinets together before attaching them to the wall?
In most cases, align and clamp adjacent cabinets at the front, screw the face frames or cabinet sides together, then secure the run to the wall with shims behind uneven areas. This keeps the visible front line straighter. If you fasten each cabinet tightly to a wavy wall first, the finished run can look uneven.
What screws should I use when learning how to install kitchen base cabinets?
Use cabinet screws or structural washer-head screws that are designed for fastening cabinets to wall studs. Avoid drywall screws because they are brittle and not intended for structural cabinet loads. Predrill when needed, hit solid framing, and use shims behind the cabinet so tightening the screw does not twist the box.
Can a beginner install kitchen base cabinets without professional help?
A beginner can install base cabinets in a simple layout with careful measuring, patience, and the right tools. The project becomes harder with uneven floors, stone countertops, corner units, islands, or integrated appliances. If the kitchen is expensive or time-sensitive, hiring a professional can prevent costly alignment and countertop issues.
Do base cabinets or upper cabinets go in first?
Installers use both methods. For a base-cabinet-focused project, setting the bases first can help countertop templating happen sooner and gives a precise reference for upper cabinet spacing. However, some professionals prefer uppers first to avoid working over finished base cabinets. The best choice depends on schedule, room access, and installation experience.
About the Author